Tuesday, August 17, 2010

Happy Birth Day Baby E!

Baby E was born at 4:08pm on August 3rd.  


My sister helped through the delivery again, like she did with CP.  Thanks Mary!


Grandma and Grandpa took the boys while we were at the hospital.


Proud Big Brothers:

J


A


CP


Proud Dad


I'm so glad baby E is here and part of our family.  He's so sweet, and we are all in love with him.  CP even licked him a couple of times (I think he was pretending to be a dog).  I'm also glad that I can sleep on my stomach again. :)

Food Storage Alfredo (sounds yummy doesn't it?)

(This isn't really called food storage alfredo- I just happened to have everything to make it in my fridge or pantry.  The name sounds mormony and maybe a little disgusting though doesn't it?)

  Lacking inspiration for dinner several weeks ago, I scanned the list of frugal dinner ideas at my friend Jessica's blog.


Here's what I found:


Alfredo Sauce

Ingredients:

  • 3 TBSP butter
  • 1 1/2 -2 TBSP flour
  • 2 cups whole milk (I used 1%)
  • Half a block of cream cheese {cut into chunks. Low-fat varieties work just as well!}
  • 3/4 cup Parmesan cheese {can use fresh or Kraft}
  • 1 teaspoon garlic powder (I used minced garlic)
  • salt & pepper to taste
Directions:
Melt butter in a saucepan on medium-low heat. Once melted, whisk in the flour. Gradually add milk, whisking to combine as you go. I generally add it about 1/2 cup at a time, whisk, then wait for the milk to heat up and thicken a bit before adding more.

Once all the milk has been added and it's hot {do not boil!} add the cream cheese. Whisk to combine. Heat the sauce back up before adding the Parmesan cheese. Simmer this until all is melted, and mixed well. Add salt, garlic powder and pepper to taste. Serve over noodles, with chicken, in a pizza, or however you like it!
Tips: I normally double this recipe, so that I can use the whole block of cream cheese. I freeze about a cup in small containers, for future dinners. I love this sauce and use it in a variety of ways, however my favorite is in the pasta dish described below. It's so easy and versatile! If it's summer, add zucchini, cherry tomatoes and fresh basil. In the winter, I add eggplant, collard greens and frozen bell pepper. Really, I use whatever vegetables I can get inexpensively! I don't actually have a recipe for this, I just toss things in and call it good! 


I mixed the sauce with some green beans and tomatoes from the garden, and some frozen broccoli, and tossed that with the pasta.  A little sauce can go a long way, and makes for a light summer dinner.  Next time I'd put about 40 times the amount of vegetables in it that I used this time.  Other than that, It was a big hit!

July and August... Where did the summer go?

We've had a busy summer, and I haven't had time/energy/desire to update my blog.  I've been thinking about getting it printed in a book as my journal, so I thought I ought to do better at keeping things up to date.
A few days after we got home from our Ferron Reservoir camping trip (and did I mention I couldn't sleep at night while we were there?  The elevation made it hard for me to breathe), we left again for Baumgartner, the yearly trip we go on with my Mister's side of the family.

We left friday after work and stopped for the night at a truck stop.  I can't believe some trucks idle all night long. 


My Mister and CP floating in the river (it was REALLY cold this year.  I had pictured myself floating in the cool water, and how good that would feel, being large and pregnant and all- but I didn't get in further than my ankles).


All the kids in the hot pool trying to sink my Mister.  


We got home from Baumgartner and started swimming lessons the following Monday.  J and CP both passed their levels.  A will take level two again next year- the boys always repeat the same level several times before advancing.

CP


A


J


Next up:  Back to School time.  We have school supplies in abundance, new clothes as needed, and we're all getting rather tired of each other (well mostly, J and A are tired of each other, and the rest of us are tired of hearing them argue).  I used to think it was weird when people would say they couldn't wait for their kids to go back to school.  I hated sending my little kindergartner to school, and was so happy when he was home all summer.  Now with the boys being a little older, and having a little too much "together" time, I've joined the ranks of those who are excited for the kids to go back to school.  

Sunday, July 18, 2010

Rice and Beans

The kids asked what we were having for dinner tonight, and for lack of a better name, I said, "rice and beans".  If I had used white rice, the entire meal could have been ready to eat in 20 minutes.  I used brown rice so it took a little longer.

In saucepan, saute onions and garlic in olive oil.  Add a can of chopped tomatoes (hopefully by next month, I'll be using fresh tomatoes), a can of kidney beans and a can of black beans.  I drained the beans, but left the liquid from the tomatoes in to make a sauce.

Add plenty of cumin, and a little salt.  Serve over rice.  Fast, easy, tasty dinner.
(The picture is my 8-year-old's second helping.  He gave the meal a 9 out of 10, claiming it lost a point because it had onions.)

Ferron Reservor

Friday, June 25, 2010

Basic Chicken and Cloth Diaper Primers

I've written a guest post on Utah Deal Diva about getting started raising chickens.

Go here if you'd like to read it!

I also have some basic getting started in cloth diapering articles here and here.

I've heard of people using diapers on their chickens to make them housepets, but I don't recommend it.

Wednesday, June 23, 2010

Harvest

We've been eating strawberries here and there for over a week now, but tonight was the first time that we've picked them and brought them inside.  (The kids love to sit outside and eat them, so getting this many at once was unusual.)

Along with the strawberries, we got 4 eggs from our 4 chickens.  I can't wait to see what we get to harvest next!

Monday, June 21, 2010

June Updates

The week that school got out we planted a large crop of beans and corn and various melons at my parents' house, then we spent several days frantically trying to get the watering systems working so we could safely go on vacation.
We left around 10am in the morning for a long drive across Nevada and California, to reach our family cabin in the woods, a mile or so off the coast.  


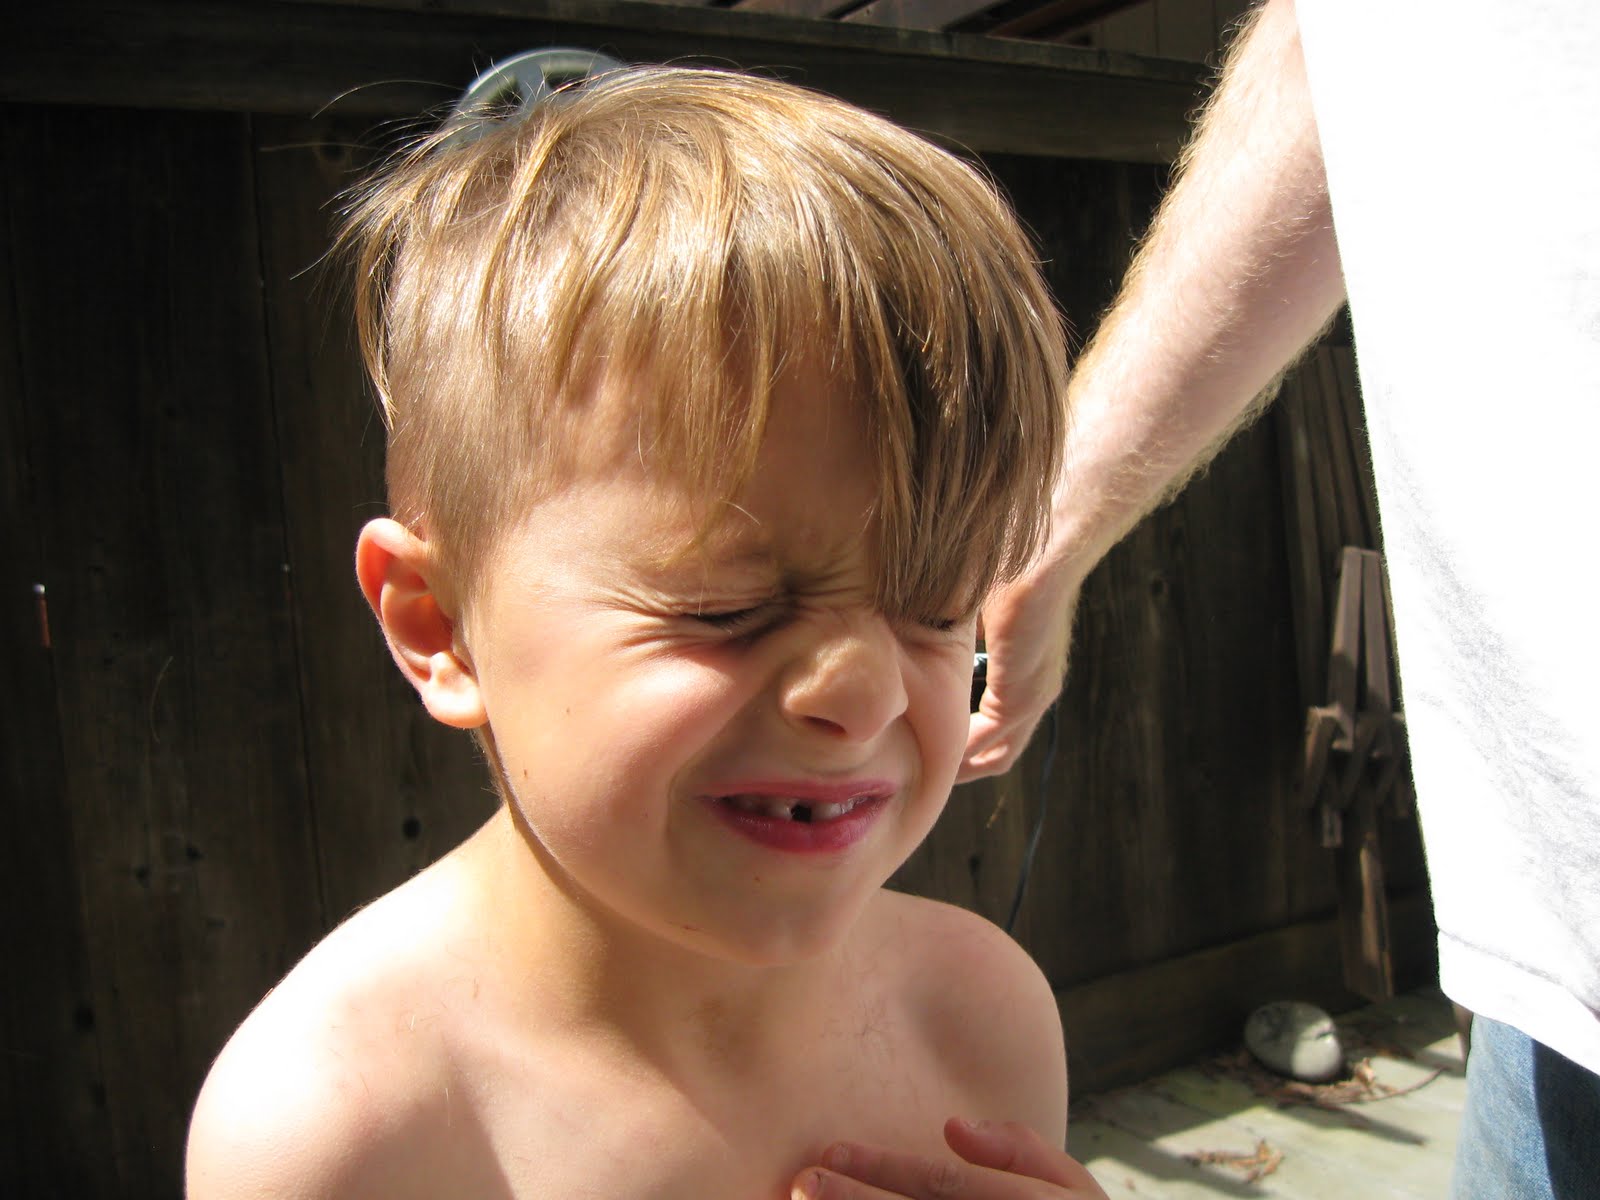
Our first item of business once we arrived (after sleeping that is), was haircuts.  The boys had really gotten shaggy.  I love this picture of A.  He was constantly brushing hair out of his eyes.  We decided that summer buzz cuts would be great (although it was tempting to leave A's as shown in the picture).  :)


Once they were all buzzed and showered, they enjoyed some hot tub time with dad.   

One day of vacation we hiked to a waterfall.  Here we are by the "smiley face tree"


We ate lunch by the water fall.


We got up early one morning to go see the tide pools.  We also took our usual trip into the town for fresh seafood lunch, and shopping at the toy store and book store.  The boys spent a huge majority of the vacation working with grandpa building their tree house.  


We were very happy to see everything alive and growing well when we got home.  Here are the green beans.


The corn in the three sister's bed is three or four inches tall now, and we planted the vining beans as well as the squash, so hopefully those things come up soon.  This picture is a good one of our new watering system that my Mister worked so hard to get operational before our vacation.  He used a length of hose to connect the tap to the pvc pipe.  He drilled holes in the pipe to correspond with the locations of the plants.  Nothing is glued together, so we can take it apart for winter storage and use it again next summer.
This section of the garden was also going to have the pvc pipe system, but we ran out of pvc pipe.  Rather than go buy more, we made due with what we had, which was a length of old hose (the one we had been cutting up to attach the pvc pipe system to the faucets in the other raised beds).  He again, drilled holes in the hose to correspond with each plant.  It will be interesting to see how it holds up compared to the pvc pipe.
After planting the beans in the three sisters bed, we realized that our experiment wasn't going to yield us very many beans, so my Mister constructed this lovely trellis for more beans to grow up.  We had a small section of raised bed with nothing growing in it, so it worked out well.
One morning I decided to break down and do some pruning.  I have a hard time cutting healthy growth off of plants, but driving through all the vineyards in northern CA, I convinced myself that it needed to be done.  I thinned out the grape vines so that there is one or two vines going to the lower wire, and one or two that we will continue to let grow so it can reach the top wire.  It looks much better now.
The strawberries that I transplanted several weeks ago have perked up, and have started to send out new runners.  By next year there ought to be another nicely established strawberry patch here.  This picture also shows one of the other irrigation types we have.  This one uses funny pipe and sprayers that direct the water exactly where you want them.  A little more pricy than our other types, but really nice to use.
We've been researching flowers to plant to attract beneficial insects and deter harmful insects.  We'd also like to attract hummingbirds.  We planted alyssum, marigolds, salvia, nasturtiums, and a couple others I can't remember now.   Most are spaced around the yard, but the extras were all planted under the hummingbird feeder.  I haven't seen any yet, but I have seen a couple of big fat bumble bees.  Usually we just see wasps, so I was excited to see more useful things.
At the nursery, while we were looking for flowers, I saw the basil, and instantly though of one of my late summer meals where we're trying to use up the prolific zucchini.  It's zucchini, tomatoes and onions sauteed in olive oil with garlic and oregano.  Fresh basil will be a really nice addition.  


We've also been trying to maintain an organized schedule this summer.  The kids have a list of jobs and homework that they have to do every day before they can play.  J's homework mostly involves practicing his multiplication tables, and A's is anything from the 1st grade section of the ABCya website.  The fourth and fifth grade sections have some fun games that J has been playing around with.  Hopefully they help him with his typing skills a little too.

Finally, at church yesterday, one of the nursery leaders came and got me out of relief society and said that CP needed help going to the bathroom.  I was confused and said, "you mean he needs his diaper changed?"  She restated, that no, he needs help getting his pants off.  I said, "do you mean A needs help?"  She must have been getting frustrated with me, because she said, "no, CP, the one with the red hair."  I was really confused, because CP isn't potty trained.  

I got to the nursery and took CP into the mini bathroom (the nursery room has it's own bathroom with a tiny sized sink and toilet.  CP wanted to use the little toilet.  I took his diaper off, which was only a little wet, and sat him on the toilet.  He went!  Then we put his slightly wet diaper back on him (the diaper bag was with dad) and washed his hands.  I'm guessing he saw the little potty, and saw other kids going into the bathroom and decided he wanted to also.  So, figuring that this week is better than any other weeks this summer, we're potty training.  He's had two minor accidents, and lots of good trips to the toilet.  I just wish we had a mini potty at home.  He's loving his big boy underpants though!

Also, as long as I'm giving updates, today CP said to me, "mom, when you do your email, it makes me irritated".  hehehe...


Tuesday, June 08, 2010

Garden Update

Corn is up in the corn bed.


Corn is up in the Three Sisters bed.  Every other hill has corn in it, and will also have beans (we'll plant them in a week or so when the corn is a little taller) and the other hills will have squash.

Some of the squash plants in the side garden are up.

Strawberries are starting to turn red.

And they have gotten really thick.  We covered them with a bird netting to keep the birds from eating all the berries.

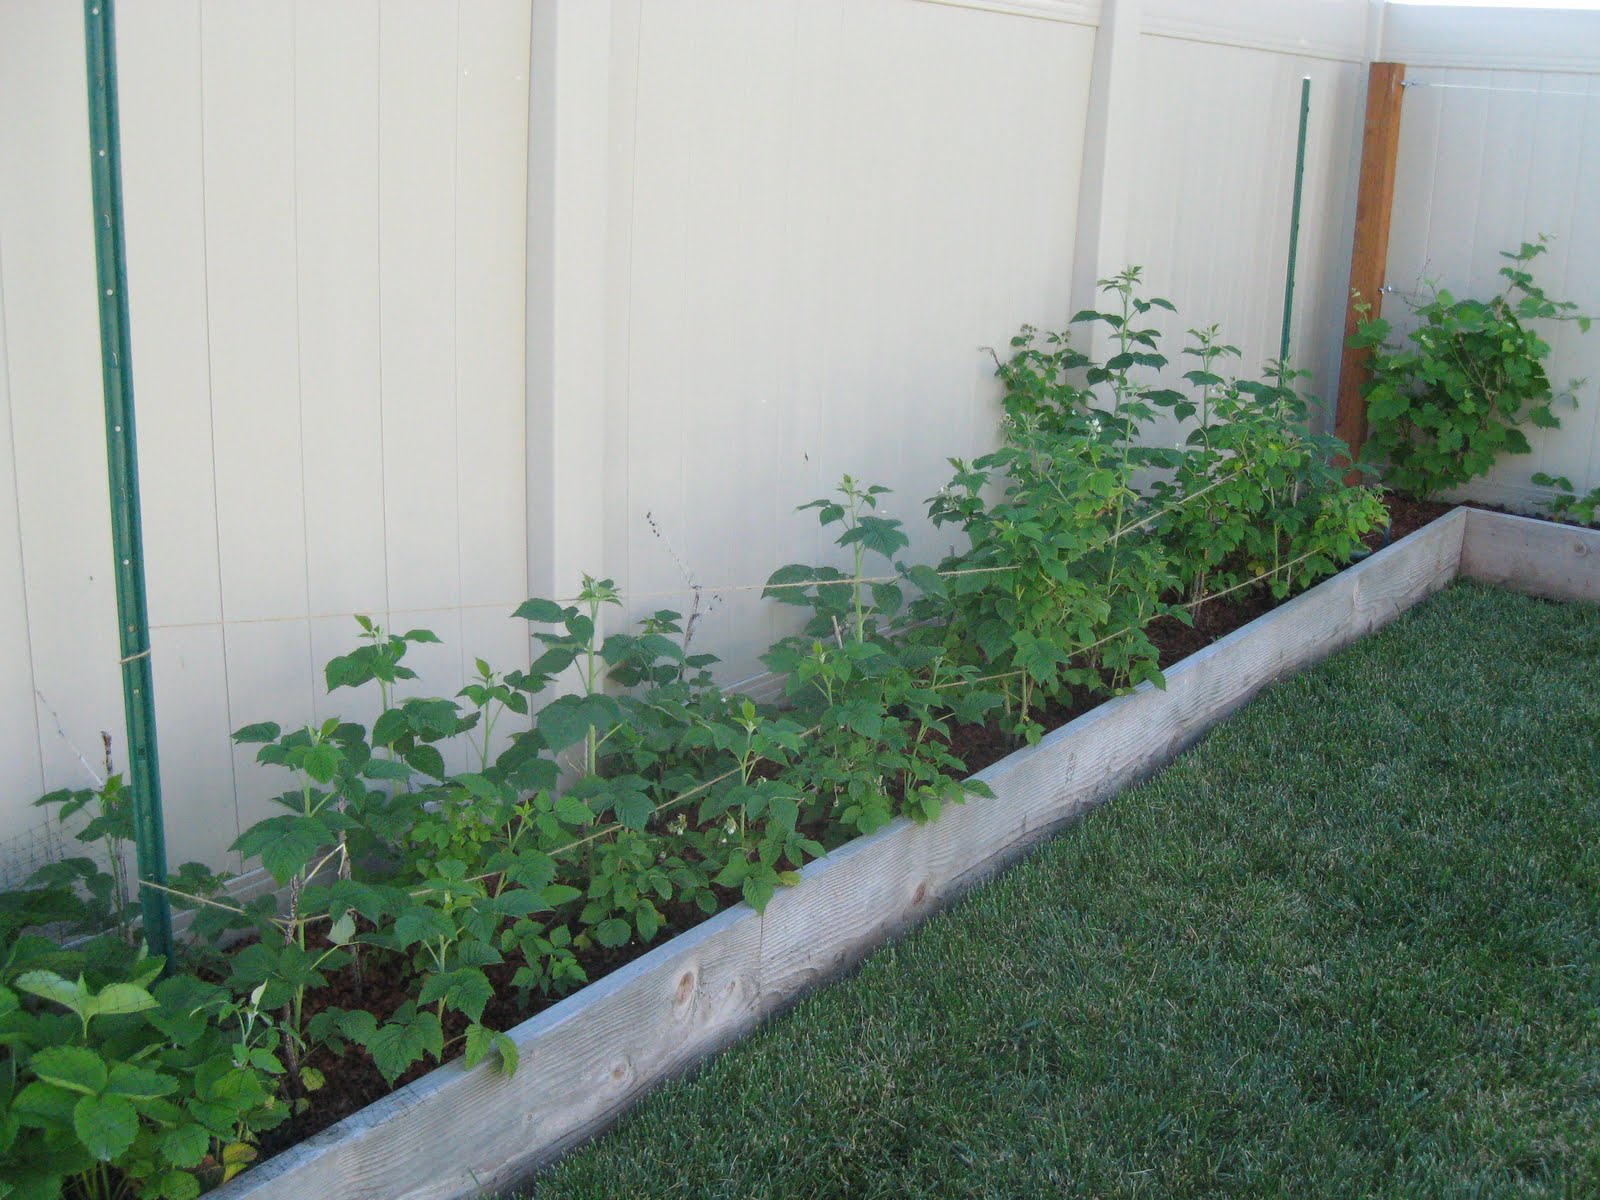
The raspberries have been staked to keep them from flopping over onto the grass.

And the raised bed around the trees is finished and mulched (this happened awhile ago, but I never got around to posting a new picture).

Monday, June 07, 2010

Good for you AND me!


I'm on the computer kind of a lot.  Probably too much (It's an ongoing battle, but I'm trying to make sure that I get everything done that I need to do before I play around too much (though sometimes you just need a break from the "MOM, MOM, MOM!!!"  The internets are good for that)).

Also, if I can find a good deal with free shipping, I much prefer shopping online to shopping in stores (I think that's a sign of middle-age- I used to love going shopping).  I've found a couple of websites that help me earn a little money back for online searches or online shopping.  If anyone is interested in signing up, you can start earning money back too, plus I get a referral bonus.  See?  It's a win-win.

I thought posting on my blog would be less obnoxious than sending all of you an email, this way, if you're interested, sign up, and if not, you're only out the time you spent reading this post.

Shop at Home is a website with partnerships at many of the online stores we regularly buy from.  If you register at shop at home, you earn a $5 sign up bonus (and if you sign up and buy something within 60 days through my link above, I get one too).  When you're ready to buy something online, you log into your shop at home account, search for the store, and if it's there, you go to the store through the link and earn whatever percentage cash back that store offers.  When you've earned $20, shop at home sends you a check.  Some stores have extra coupons posted, in addition to the cash back.  If I'm buying stuff online anyway, I might as well get a little something back for it!

Search & WinThe other site, Swag Bucks is a search engine where you earn "swag bucks" for searching online (there are a few other ways to earn swag bucks, but searching is the main one), and then you can trade in your swag bucks for prizes.  I trade mine in for $5 Amazon gift cards.  It takes me a month or two of normal searching, generally to earn enough swag bucks for a $5 gift card, then when I have $25 worth, I buy something I've been wanting on Amazon, and get the free shipping.  Right now I'm saving up for some new bread pans.  I've downloaded the swag bucks toolbar, which puts a search box at the top of any window I have open, so I don't have to go to their website to search.

Unusual Baking Techniques for Desserts

Yesterday as we were cooking dinner, (wild rice, chicken on the grill, and broccoli) we started thinking that we'd like something for dessert.  I suggested a cake with coolwhip topping since we have kind of a lot of coolwhip right now.  The only problem was that turning on the oven didn't sound like fun.  I started looking around online and came across this website that had instructions for baking cakes in your bbq grill.  We actually made apple-strawberry crisp.  The picture is a little blurry, but it was delicious.


Prepare Your Barbeque and Cake

  1. Light the BBQ and allow it to preheat.
  2. Prepare the cake batter from a mix or follow your favorite recipe.
  3. Grease and flour the cake pans.
  4. Pour the cake batter into the pans.

To BBQ Cake with Indirect Heat

If you have three elements on your BBQ, you can use indirect heat.
  1. Turn the two outside elements to low and turn the center element off.
  2. Place the cake pans on the center grill above the element that is turned off.
  3. Close the BBQ lid and allow the cake to cook for 20-25 minutes. Avoid opening the lid to check the cakes during this time so the heat stays inside and creates an oven effect.
  4. Check the cakes. They are done when they feel springy to the touch and a toothpick inserted into the center comes out clean. If they are not done after the initial time has passed, close the lid and continue cooking for 5 more minutes and check again.
  5. When they are cooked, remove the cakes from the BBQ and place on a cooling rack.

To BBQ Cake with Direct Heat

If you have two or fewer elements, you can use direct heat.Turn all the elements to low.
  1. Place an empty pan upside down on the grill above the element
  2. Put the batter-filled pan on top of it. The extra pan adds a little more distance from the heat and helps to keep the cake bottom from burning.
  3. Close the BBQ lid and allow the cake to cook for 20-25 minutes. Avoid opening the lid to check the cakes during this time so the heat stays inside and creates an oven effect.Note: When cooking on direct heat, the cake cooks a little faster.
  4. Check the cakes. They are done when they feel springy to the touch and a toothpick inserted into the center comes out clean. If they are not done after the initial time has passed, close the lid and continue cooking for 5 more minutes and check again.
  5. When they are cooked, remove the cakes from the BBQ and place on a cooling rack.
When the cakes are cool enough to touch, remove them from the pans, If desired, cool cake completely and spread with icing or serve them warm with ice cream. Enjoy!


Saturday, May 29, 2010

Weekend Yardwork

We woke up this morning to gray skies and didn't think we'd get much done outside.  My Mister hurried out to mow the lawn before it rained, and I got back to work on the annuals in the front flowerbed, I bought them yesterday and got several planted (I also cleaned out the dead tulips), but had to stop because of the weather.  This morning, I got them all planted, and only got rained on a little.  Normally, I don't buy annuals, I like flowers that keep coming back every year, but there wasn't a lot in bloom right now, and I needed a little color.   I think the flowerbed could really use a for more perennials, but hopefully the annuals fill out and suffice for this year.  I pulled a couple of plants that I wasn't sure about- they could have been weeds or they could have been perennials.  My neighbor thought they were weeds, so out they went.  There's one other plant that is either a weed or a really big perennial.  I'm leaving it because it doesn't look bad and hasn't gone to seed yet.  It has a stake by it that says butterfly weed, so that's either what it is, or it's a weed that took over that perennial's spot.

I thought that would be the end of my work outside today, but after some minor hailing, the sky cleared up again.  I headed back out and started pulling weeds from around the fruit trees (if the trees look close together, it's because they are- it's called planting multiple trees in one hole).  I should have taken a before picture.  The weeds filled in the whole area around the fruit trees, and were nearly as tall.  We nearly filled our huge garbage can, just with weeds from this one area.  I had to use the shovel for some of the bigger weeds.  It was crazy. We also pulled out the dead apricot tree, which wasn't very hard because it had no roots on it.  All that's left to do here now is plant another apricot tree, build the second box, fill in around the edges to bring all the soil up to the proper level, and then mulch well to avoid the kind of weeds we pulled today.

I thought I'd take a break and watch my Mister work for awhile.  He was loosening the soil in two of the raised beds.  The far right one was full of wheat grass.  The chickens used to be in that bed, and all winter, we've been feeding them scoops of wheat that had weevils in it, well this spring, all the wheat that they hadn't eaten, grew like crazy, with all that good fertilizer the chickens had left behind. My Mister weed whacked it, pulled out the big stuff, and worked the rest back into the soil.  Hopefully it will be ready for some tomatoes and peppers on monday!  The other bed will get filled with corn.  The tiny space next to the chickens will be some kind of squash most likely, as will all the raised bed area around the perimeter of the yard that doesn't have something else planted already.  (You can see all the weeding that still needs to be done, we really let things get out of control this year!)

Since I was sitting near a weedy area, and not doing anything, I started pulling weeds.  I weeded around the lone black raspberry plant (which has actually multiplied quite a bit since last year, but is still kind of sad.  Don't ever plant just one cane.), the asparagus, the strawberries (which are doing great this year, and are so thick that there were hardly any weeds), the raspberries, and one section of grapes.  I also used some of the grass clippings to mulch around the asparagus.  I need more to mulch around the raspberries, and the strawberries are thick enough that I'm not mulching around them, though in the fall when we whack them all down, it might be a good time to cover the area with straw.

As I was weeding, I noticed the strawberries have been usurping asparagus and raspberry land, so I dug what at first seemed like just a few plants, but ended up with enough to give a nice start to a new strawberry bed under half of the grape vines.  The soil in that area is really wet, I'm not sure why, but hopefully the strawberries survive.  They're looking a little sad at this point, but they did just get dug up and transplanted, so maybe they'll recover.

The yard looks great, I think it's time for a BBQ (pork chops on the grill anyone?).